Pages

Saturday, May 25

Garden wall teaser...

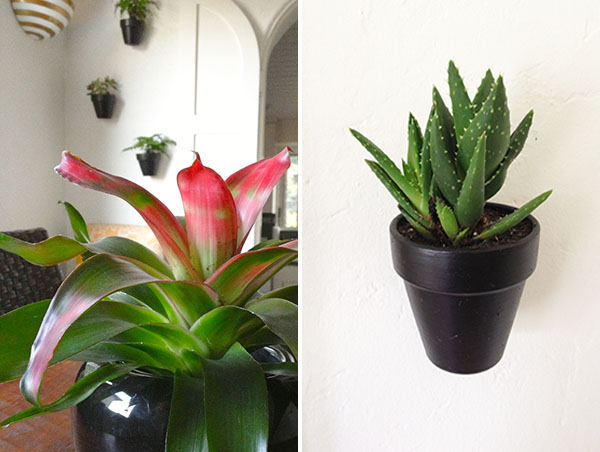
So, I guess I'm finally ready to post some pics of the interior garden wall.  I did promise after all.  This weekend I'm going to write one of my massive posts about the diy process.  In the meantime though, here's a lil' teaser.

Plant detail

Pretty, right???  I love the way the black pots and all that greenery pop against our white walls.  Every time I look over there it makes me happy. 

Of course, it's still a work in progress.  More plants to come?  Maaaybe...  Can we keep these plants alive?  Doubtful.  (Hmmm...that means we're going to be buying a lot of replacement plants...)  Should we buy stock in a plant nursery?  Probably.

Stay tuned!


Friday, May 24

DIY :: String Art in the Dining Room

Today's DIY project started with my dear friends, Chase & Aaron.  Aren't they a cute couple? (Biff would kill for their VW Bus.)


chase & aaron
Of course, as usual, I've never met these people.  But still.  I came across their insanely gorgeous wedding on Green Wedding Shoes last year and fell head over heels for them and their crafty skills.  Remember, I too, got a little crafty at our wedding so maybe I think of Chase & Aaron as kindred spirits or something.

You see, when I saw their DIY fence & backdrop signage, my head just about exploded because I loved this idea so much.
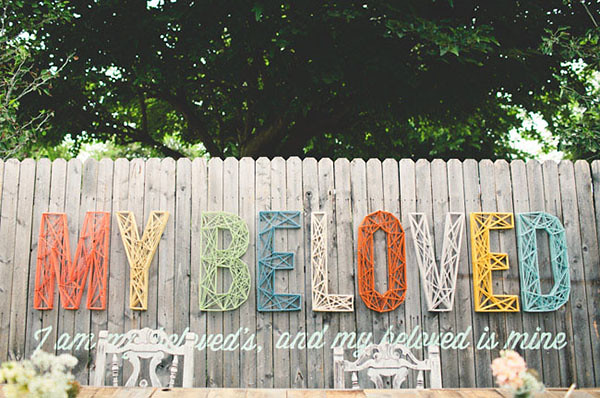
chase & aaron's wedding

SO great, right???

Well, of course that lead to hours spent on google & pinterest searching and finding tons of other inspiration images.  And, once again, I was reminded how many incredibly creative and talented people there are in the World.

Case in point:

These ballerinas have totally twirled their way into my heart.

string art ballerinas

This installation is super lovely too.  Megan Geckler, you are brilliant!

string art installation


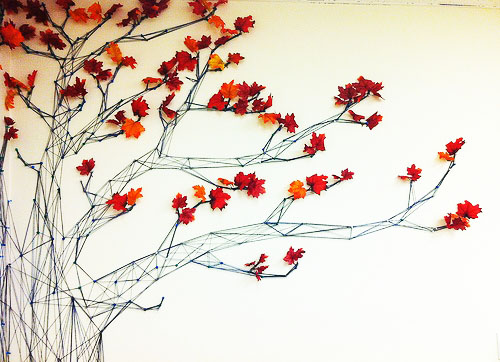
Hi there, pretty little tree.

string art tree

And these stairs???  Endless amounts of gorgeousness here.

string art stairs

Oh my.  And thanks to the Jealous Curator via Emily Henderson, I'm crushing on these "Sewn Houses" (which are totally attainable btw...yay!) by artist, Hagar Vardimon-van Heummen.  Such a great name, right?
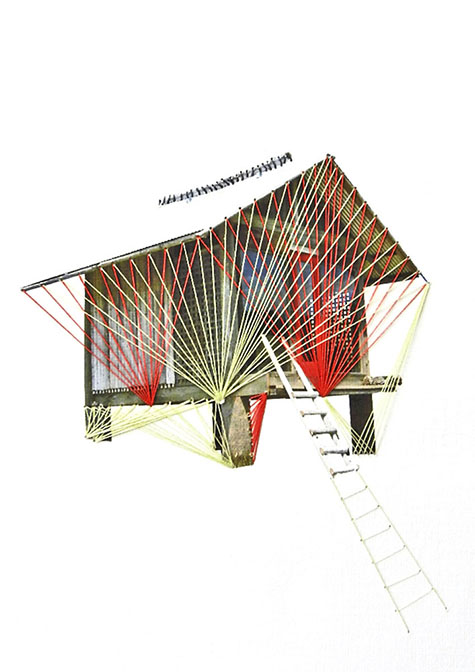
Sewn House

Yes.  All of these artists are aaaah-mazing.  But let's get back to the (simpler) art of string letter making.

Now, if only I had thought to look up a tutorial on-line (there are several) before I decided to start this project.  Why oh why must you make things so difficult, Cham+Thom?  No tutorials for me.  I just knew that I had the space and needed some art.   So here's what happened...

I came up with the idea to do a string art project with the word, "GATHER"; it would hang in the dining room over our table.  First I printed up the letters and simply taped them to the wall.  Truly, I probably left them up there for a week or so...just to see if this idea of mine would stick.
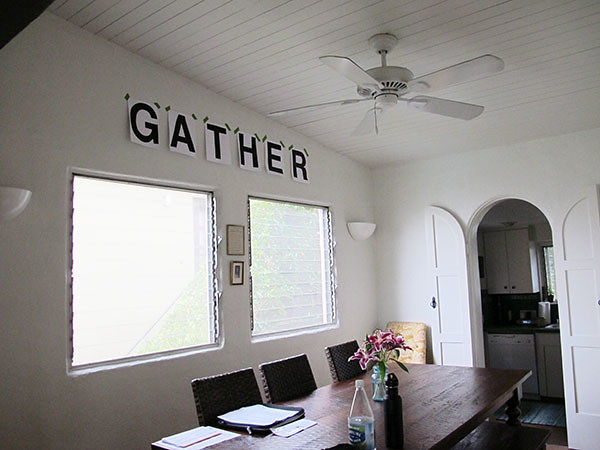
mapping it out

And it did.  So I bought myself a piece of wood, stained it and let it dry.
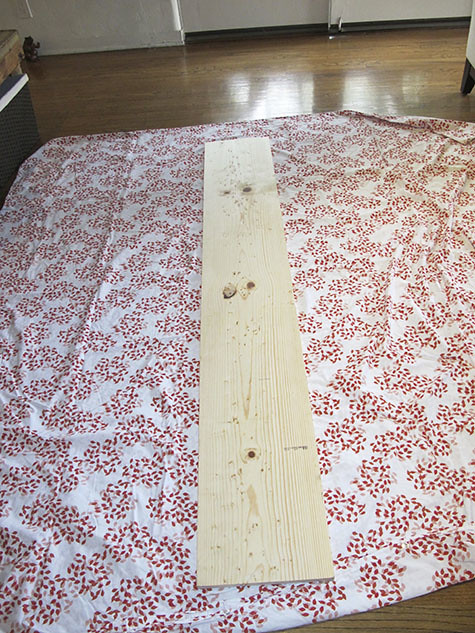
Wood

Next I taped my paper letters onto the piece of wood and hammered in the nails, outlining each letter.  This is where one of those online tutorials would've come in handy.  After the fact, I learned that I should've placed the nails equal distance apart all the way around the letters.  Oops.  We just randomly nailed in those suckers.  And of course, things turned out just fine in the end BUT I can see how having the nails evenly placed would've been super helpful.
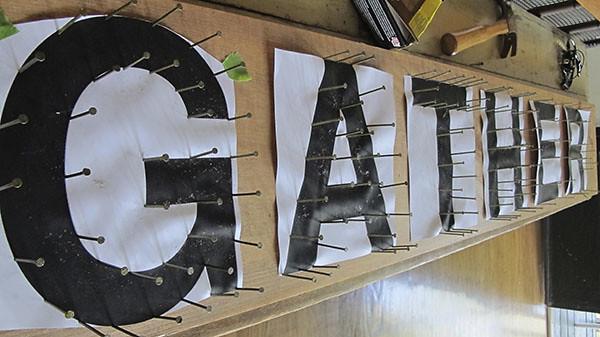
nails on paper

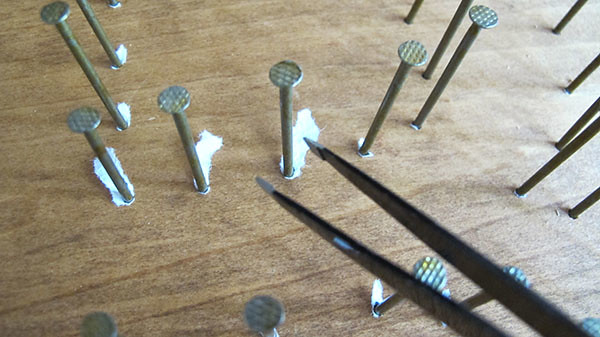
I then went about removing the paper.  Hmmm... All those teensy weensy white paper dots sticking out where the nails attached to the wood?  Well, that was not planned and not good at all.  And quite frankly, a major pain in my arse.
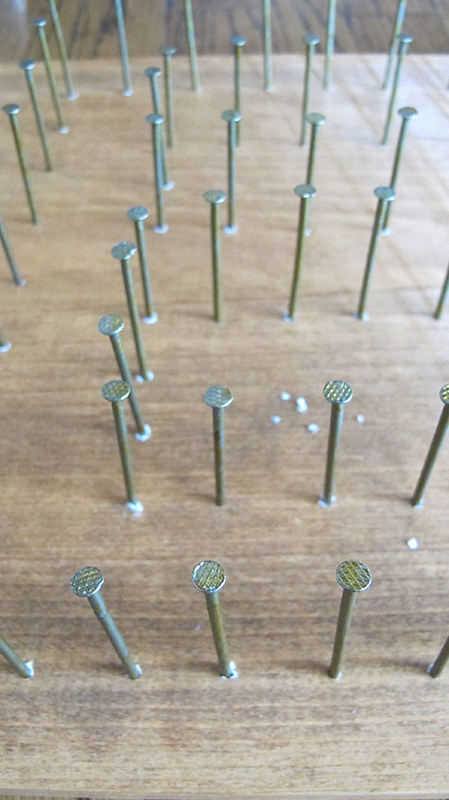
nails

Thank goodness for tweezers.

tweezers

Once I had removed as many of the paper specs as possible, I got busy with my string.  I simply tied a knot around one of the nails and then randomly wove the string through the nails.  Of course, I'm absolutely positive that there must be a "correct" way to do this.  Again, a tutorial may've been helpful. For me though, the random pattern worked and I'm happy with it.
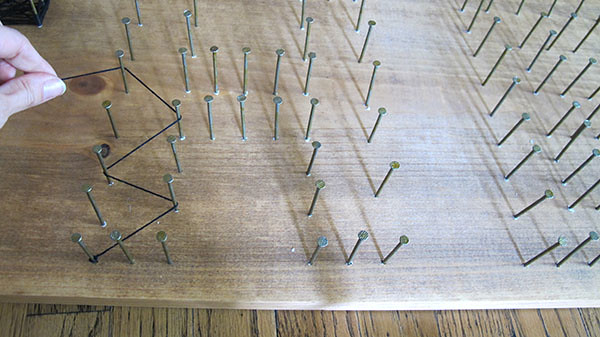
begin string art

With Chase & Aaron's sign in mind, I started off using a thicker yarn.  Soon though, I deduced that the letters on their sign must've been way larger than mine.  For my project, I thought the yarn looked a little bulky.  So back to Michaels I went and I grabbed some Crochet Thread.
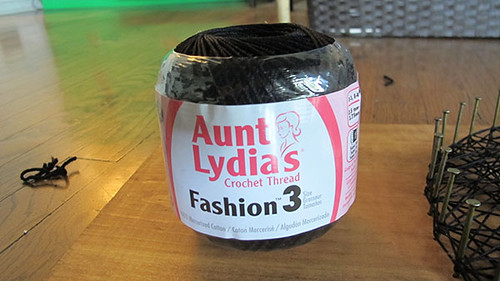
Crochet Thread
I tightly wove the thread in and out of the nails, intermittently pressing the layers of string down towards the wood base so I could gauge the thickness.  I also threaded the entire outline of the letter several times to make sure the shape was clearly defined.  
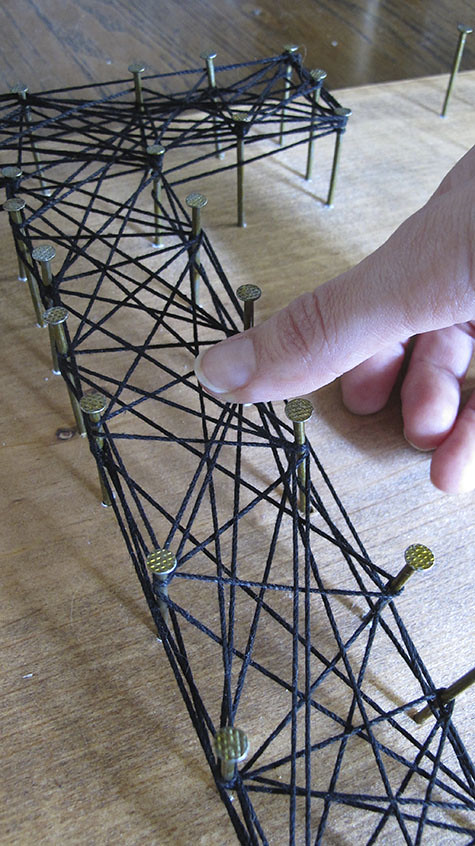
press down string

It took me forever to get to this amount of thickness and for me, it does the trick.  I suppose I could always add to it later though...if I ever feel like torturing my poor little fingers again.
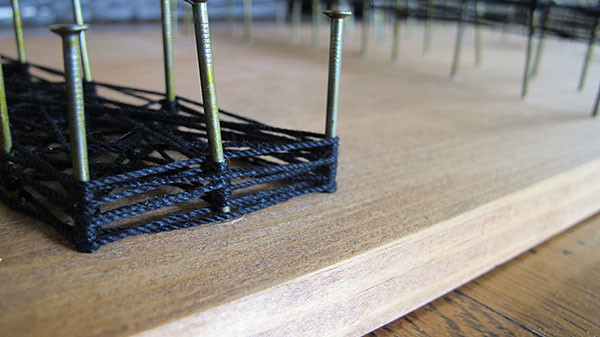
check thickness

In this photo I'm testing the yarn (on the "G") versus the crochet thread (on the "A").  I didn't want to unravel the "G" until I was totally sure that I wanted to go with the thread.  You can also see the difference between a completed letter (the "A") and the beginnings of weaving (on the "T").  As I mentioned earlier, I decided that the thread was the way to go.  It only took me FOREVER to re-do that "G".
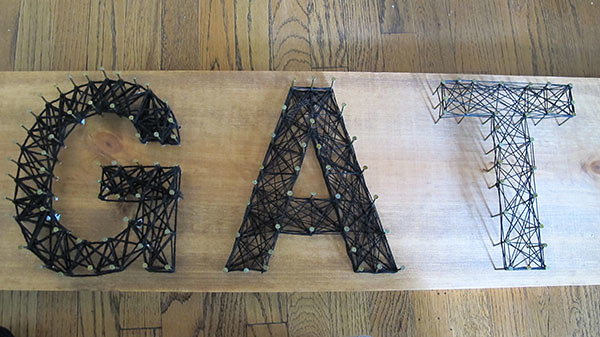
comparing yarn & thread

What we ended up with was some rather lovely string art, folks.  I love that, at first, you don't even realize it's string and nails.
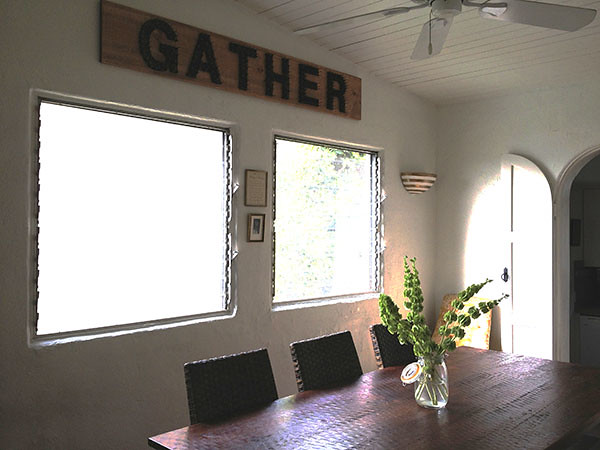
dining room artwork

A closer look though, and all is revealed.  Hello, crooked nails.  Why must you torment me so?
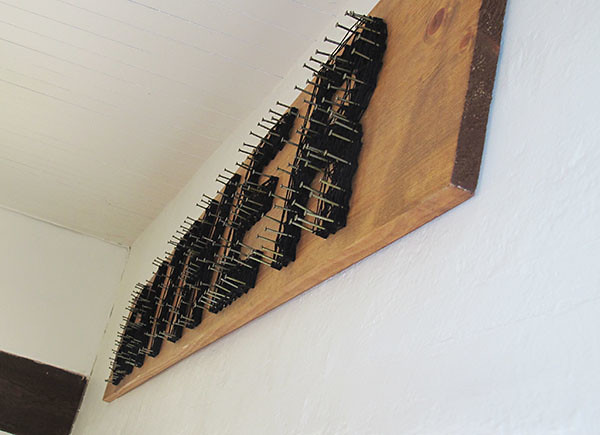
string art detail

It's not perfect, of course.  But here at Camp Cham+Thom, we love it.
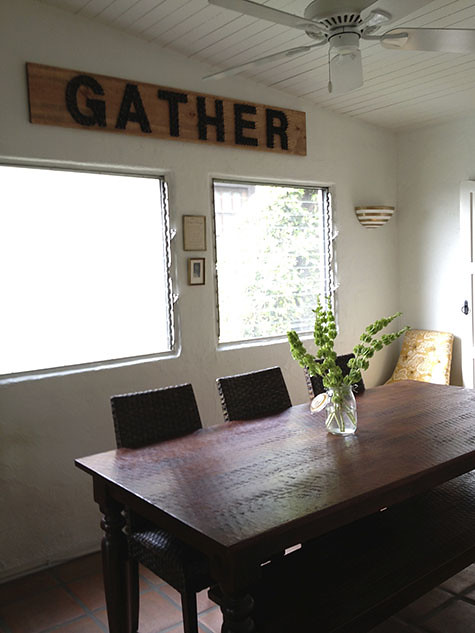
string art finished

Slowly but surely the dining room is coming together.  Next up, is the garden wall!  And perhaps one of these days, the addition of some sort of colorful window treatments?  Hmmm...  I'll keep you posted.

Thursday, May 23

DIY :: Stripes meet sconces!

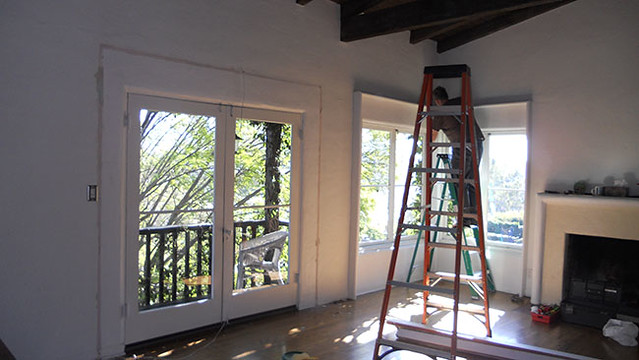
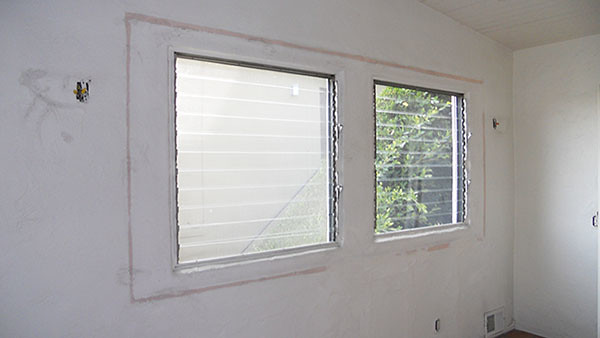
As we toured the main floor of the treehouse yesterday, I pointed out the bizarre wood moulding that surrounded some of the windows and doors.

TreeHouse Living Room_Before1

TreeHouse Dining Room_Before Windows

I just couldn't wrap my head around why this moulding was necessary.  As I mentioned before, I can only imagine that it was there for curtains, but still.  Why???  Thankfully, we talked to Carol (our landlord) and she gave us the okay to verrrrrrry carefully remove the protruding pieces of wood.  So that's exactly what we did.  

With 2 weeks to go before moving day, we set out to do the following:
1. Remove moulding around the windows and balcony doors.
2. Patch & Sand.
3. Remove tv mounted on the wall.
4. Patch & Sand.
5. Paint a fresh coat of white paint on every surface, including fireplace front (cream colored in before pics?) and the sconces in the dining room.

During that two weeks, this happened.

Treehouse window molding_2

And then this.  SO much better!!!!
TreeHouse Dining Room_After Windows
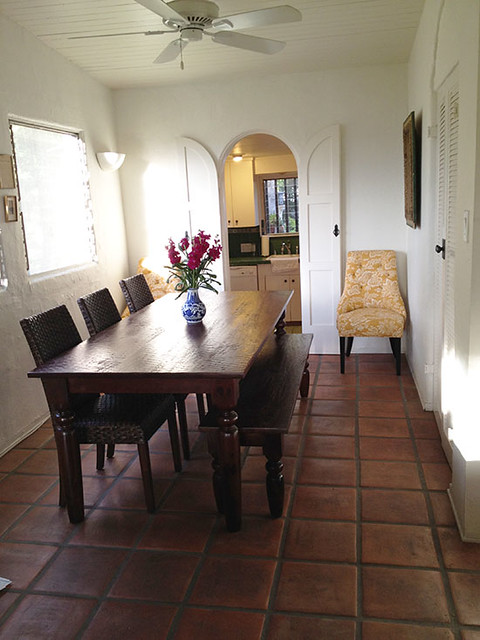
And just one week after we moved in, the dining room looked like this:
treehouse dining room_table

Not bad, right?  Now due to time limitations (read: me being impatient) we decided to go the big box route for dining room furniture.  Not the norm for us, but in this case, it worked.  We pulled this look together from Cost Plus.  Instead of going super matchy matchy we purchased the table and its' matching bench, but then opted for wicker chairs for the opposite side of the table.  We use the 2 yellow chairs (also from Cost Plus) you see there in the background when we need extra seating at the ends of the table.  We've easily got seating for 8 and in a pinch, we've squeezed in 10 people.  It's fine for now but truly, I'd like to replace all of that seating.  The table is great but I'm not in love with the chairs (any of them) or the bench. Who knew benches were so uncomfortable???  All in due time I suppose...all in due time.

So that photo was a week in and it's pretty much stayed the same since.  Still no color on the walls and not a lot of art.  But, we are definitely working on that! I'm hesitant to paint in there.  Actually all of the upstairs has these crisp white walls (except for our BLACK powder room to be discussed at a later date).  The space is so open and the ceilings are peaked.  Color just doesn't feel right in there; in our upstairs living and dining areas our furniture is neutral and the color comes from the greenery outside the windows, some of our painted furniture pieces and artwork.  But hold on.  I'm getting ahead of myself again.

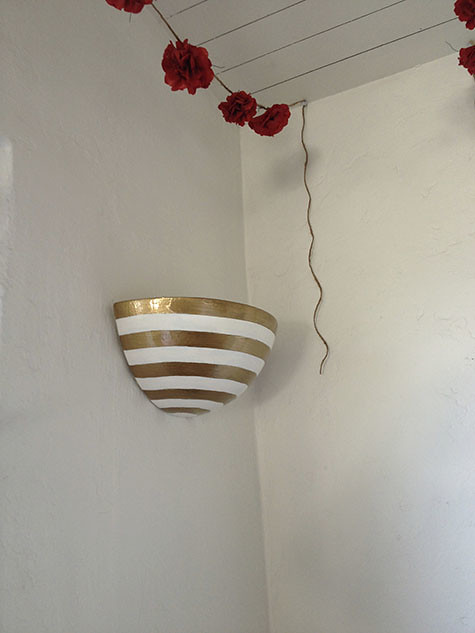
Right around the holidays I made the first attempt at spicing things up in the dining room.  I thought about replacing the existing sconces but in the end I decided to keep them and have some fun with paint instead.   Playing it safe, I knew that if I did anything that looked especially horrible that I could simply paint them back to white again. Now if only I hadn't had the brilliant idea to paint stripes on curved sconces.  Oh the headache!!!

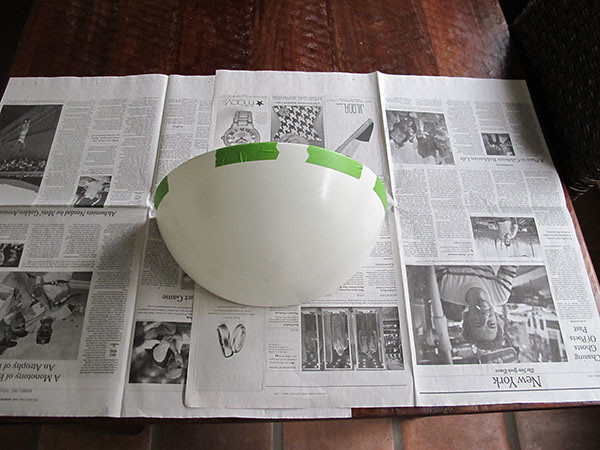
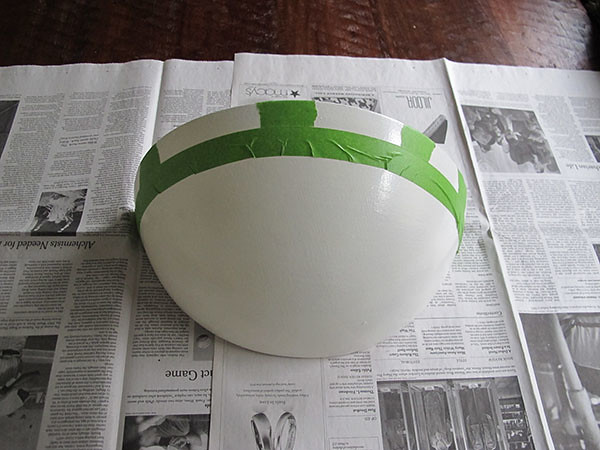
I had no idea what I was doing so I kind of figured it out as I went along.  I used small pieces of 1" Frog Tape as a guide.
Sconce_taped
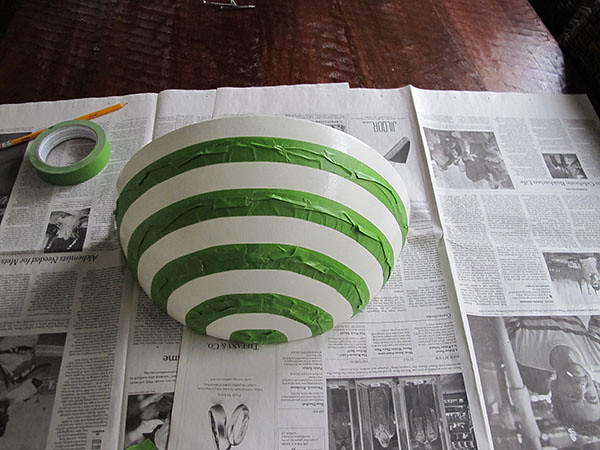
And then I tried my best to follow those small pieces around with 1 long piece of the frog tape.  But that was WAY more challenging than I was counting on.
Taping the sconce
At times I had to piece together the "sripes" with tape and tried to get the edges pressed down as much as possible to prevent seepage.  I just knew it was going to be a total shit show when I removed the tape though, so I did the best I could and planned on doing a ton of touch ups later.  I don't think it was the Frog Tape's fault (that product usually works great); I think it was just the nature of the beast really. 
 
Sconce_before
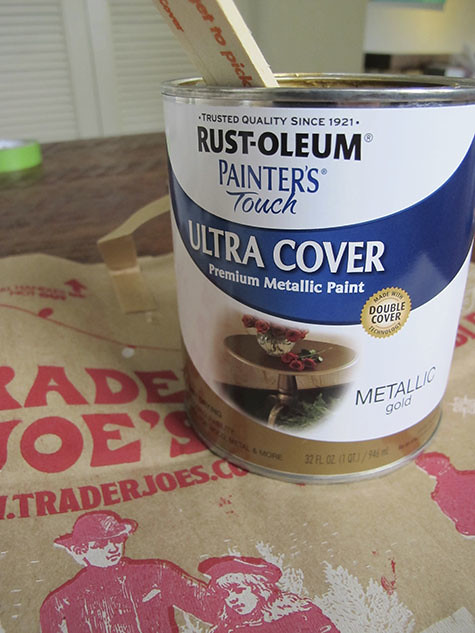
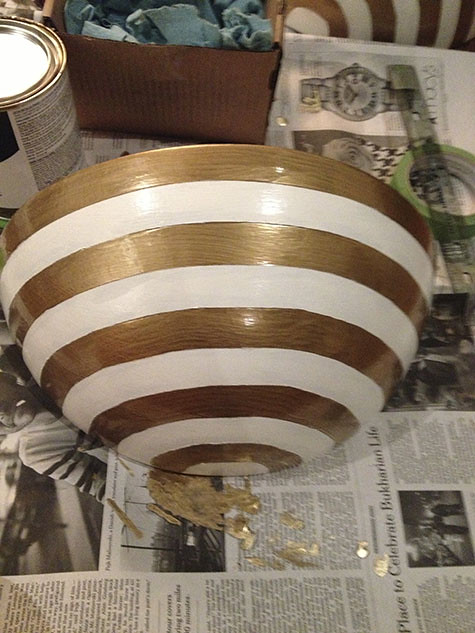
I used Rustoleum's Metallic Gold Paint and I love it, although I wasn't prepared for the watery consistency.  Never fear, I just glopped on a million coats and everything turned out dandy.
Metallic Gold Paint
At least I think so.  Metallic gold stripes, meet my sconces! Here you can see I've been doing some touch ups but it looks like it hasn't fully dried yet.
sconce
But lookie here...  So pretty!  And they were up and ready to go just in time for our holiday party!  
Striped Sconce
I may or may not be just a teensy bit in love with them.  Who wouldn't like gold striped sconces in the dining room???  Now of course, this is just Phase One of the master plan to "spice up" the dining room.  There's plenty more progress to see including a fab DIY string art project.  I'll have that for you tomorrow!

Tuesday, May 21

The Treehouse :: the upstairs

Now that I've shown most of the projects we accomplished at the San Gabriel House, it's time to bring you up-to-date on a few of the more recent goings-on around here.

Cham+Thom Interiors is officially up and running & I've also been working on a ton of personal projects for the casa lately.  Did you see the cute re-do of my flea-market-find last week?  Well, if you looked closely at that post you may've gotten a sneak peak of yet another newly finished project happening in the dining room too.  More on that soon and yes; I know I'm behind schedule but I promise to post pics of the completed garden wall before this Friday!  And if you're following along on Instagram, well then you already know the dining room is looking mighty green and mighty fabulous these days.

So, you've probably heard me refer to our current house as the "treehouse".  I also like to call it Camp Cham+Thom.

It really is lovely.  It's in the hills of Silverlake with a beautiful view of the Reservoir and it truly does feel like a tree house!  We're perched on a hilltop with our main floor balcony, literally, in the trees.  We are one with the birds, the squirrels and lots of other lil' creatures (who I may or may not wish to be friends with).  We all get along for the most part though.  We have boundaries.  Well, usually.

mouse in the house


Yes, people; that is a baby rat in my house!  I had gone out for a glass of wine with a girlfriend that night.  Seriously.  I was gone maybe 1 1/2 hours.  It was a Friday.  A hot day.  It was still early and light out when I left so I kept the balcony doors open.  I wasn't gone two hours and Bam! there's a rat in my house.  That's great.  Look at Gracie Jane Pickle.  She has no idea what to even do with this present that has fallen into her lap.  She's an indoor cat.  She only sees this stuff out the window or on the Nature Channel.  She's totally out of her element here.  Instincts?  Nope.  I don't think she has any.  She's like the big guy in The Green Mile.  She would never want to kill that poor thing; why would she kill her new friend?

Sadly, we've encouraged her killer instincts by our uncontrollable giggles and praise, as we watch her swat at her electronic toy mouse (that looks a little too similar to this fella).  So now she's swatting at this little beast (I swear he looked bigger in person) and I find myself screaming for her to stop.  Oh great.  Somehow it becomes my mission to keep the rat alive.

I called Biff and he laughed at me.  I think he expected me to kill it.  What?  HOW???  There may or may not have been some squealing.  By me.  And there may or may not have been a moment when I was standing on the sofa.  When I was squealing.  I texted Biff this picture of me (that's me last year with longer hair) after the fiasco was over and I had successfully SAVED Ratatouille's life.

Like I said.  We are one with nature here at Camp Cham+Thom.

But...I digress.

The house would only be more perfect for us if money were no option and we owned it! Then, of course, we might make a few more costly upgrades, but for now, we're all good.  We know how fortunate we are.  Our good friend is actually the owner and our landlord.  Which is how we came to know of this little slice of awesomeness and it's availability so we could pounce on it!

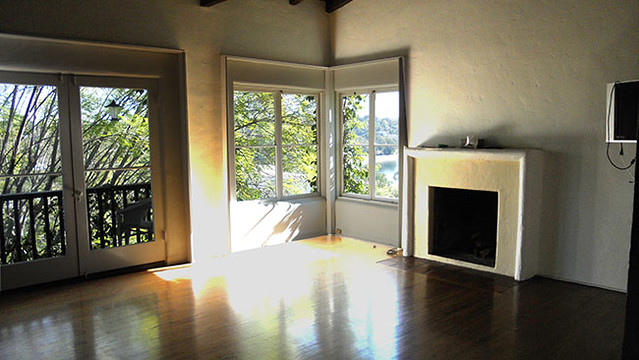
Here are some of the before photos taken in December 2011.  The house is Spanish built in 1928.  In this first photo I'm standing near the front door, facing to the left.  I turn a little to the right with each of these first few shots so you can get a sense of the whole room.  See those trees!  Like I said...we live in a treehouse!

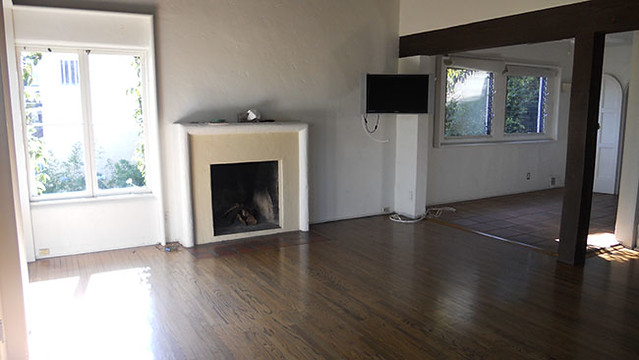
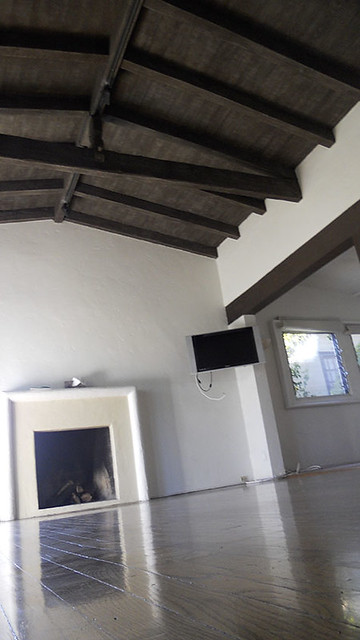
The living room has a wood-burning fireplace.  Initial thoughts on the space: LOVE IT but what is up with that weird molding around the doors & windows?  Am assuming it was for draperies but why would you have curtains in this room?  No one can see in and the view is AMAZING!

TreeHouse Living Room_Before1

In this photo you can see the dining room over to the right where the saltillo tile flooring begins.  The previous tenant left the tv you see here.  A tv mounted WAY too high in a space this gorgeous?  No thank-you. It had to go.

Treehouse Living Room_Before3
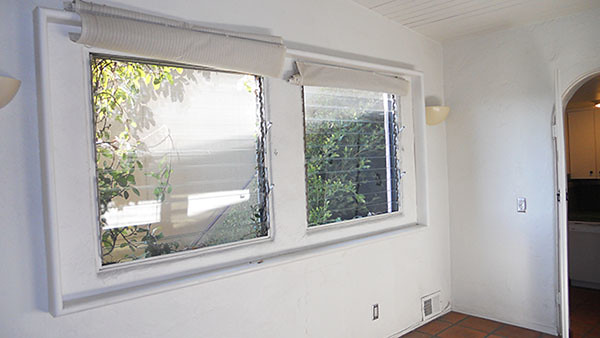
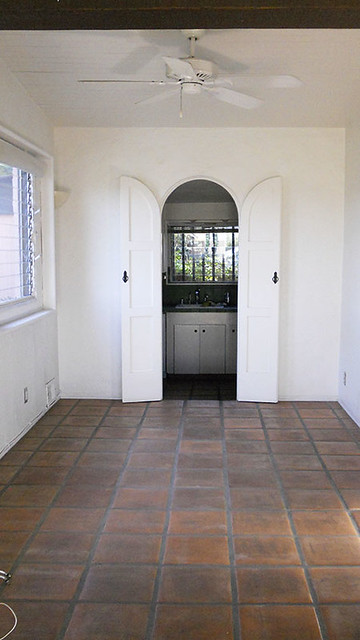
Here's a closer look at the dining room which steps down into our teensy weensy kitchen.  It's a nice size space and has a peaked/slanted ceiling but again, what's with the weird window framing?  I'm so curious if it was original to the house.  And although I wouldn't have them in the living room, I'm not opposed to window coverings in the dining room; our neighbor has a side door that is close by and there have been more than a few moments of awkward eye contact.  

TreeHouse Dining Room_Before

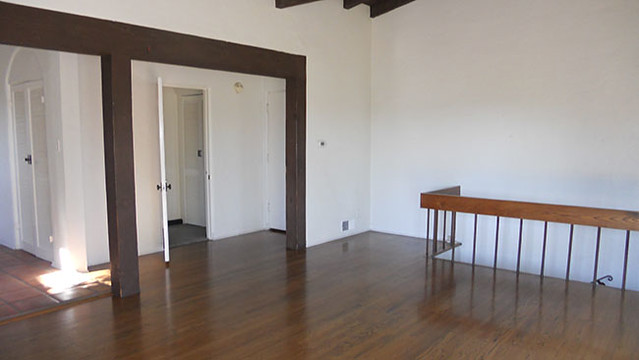
And back into the main living room again.  Now I'm looking towards a small powder room and the front door.  The railing you see there is to a staircase that leads downstairs to the bedrooms and a full bath.

Treehouse living room_before4

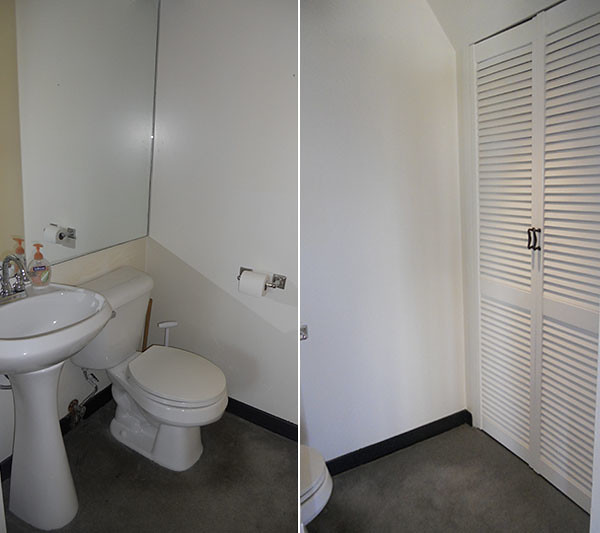
A quick look at the upstairs powder room.  Yes; that is carpet on the floor.  I know...I know...it's unthinkable, right?  Look.  I know it's not ideal BUT there's so much other goodness going on here that we've somehow gotten over it.

Treehouse upstairs bath_before

Just forget about the carpeted bathroom.  Instead look at this beyond gorgeous ceiling of ours.  Bathroom Shmathroom.  Like I said, we are so soooo fortunate.

Treehouse living room_ceiling

So, these photos show how the upstairs looked when we moved in.  We've been here a year and half now and it feels more and more like home every day.  Things are still a work in progress and we are definitely taking our sweet time but I'm excited to show you what we've done so far.  Check in tomorrow to see that wonky molding come down and watch as the larger pieces of furniture find their place in the design plan.

Tuesday, May 14

Client Report :: Ohio Guest Room

I'm working with a new client who also happens to be one of my besties.  My sweet friend Liz.  We met when we lived together in college.  No literally, we met the day we were moving in to share a bedroom.  It was pure madness in the best way.  We were roommates on and off for years and actually, she's the reason I moved to LA in the first place. Wow. I forgot about that.

Aaaanyways... Let me get back on track here.

After living in LA for many years, Liz (along with her husband and their 2 boys) moved to a small town in Ohio, just outside of Dayton.  They had a home built there a few years back; it's a big one and on a bit of land.

I visited her recently and because I just can't help myself (forgive me...I have a sickness), I talked about my decor ideas for her home.  All that talking lead to hours of creative brainstorming and now I'm super excited because she's hired me to design one of their guest rooms.  Eventually, when time and budget allow for it, I'm hoping to take on some other spaces in their house too.  It really is a beautiful home; it's big though and needs more "stuff" in it.  It's weird hearing myself say that because I am not one at all for cluttered spaces.  But the house just feels too empty to me; I feel like it needs more layers...more "stuff"!

You want a house to feel lived in.  Like it's been decorated over time with all the nooks and crannies filled with memories.  Take a minute to look around your house.  If your walls could talk, would there be stories to tell?

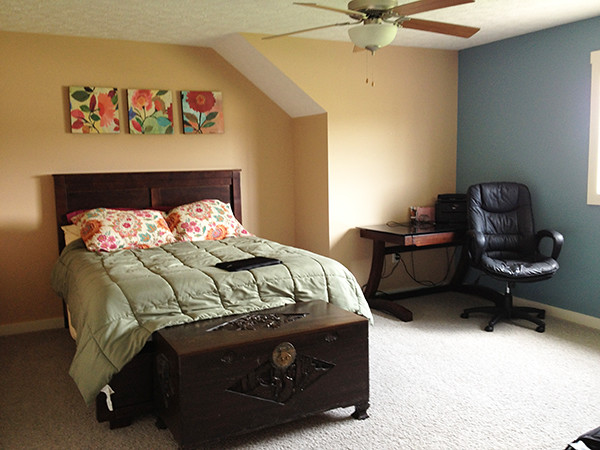
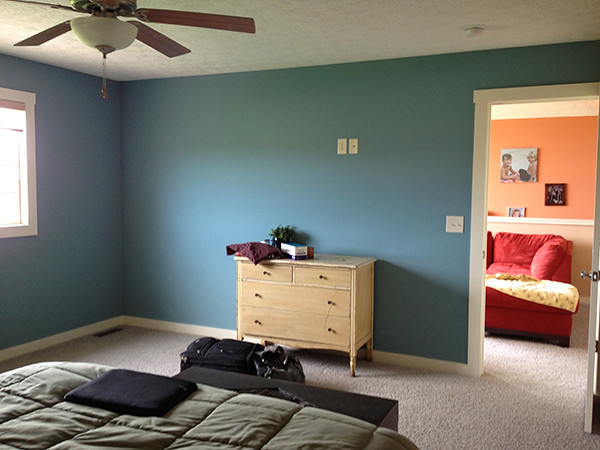
Case in point...  Here is the guest room I'm working with.  Again, it's really quite spacious.  At the moment it just looks a bit empty though.

Now, if you know Liz, you know that girl loves the beach and the sunshine.  So moving from LA to Ohio has been quite an adjustment for her.  Every winter I get the call...well, multiple calls actually. :) "I just can't do it anymore...  It's so dark...  It won't stop raining..."  It's like clockwork.  And trust me; I totally get it.  Those winters are long and everyone has their breaking point.  So I really want to keep that in mind when I'm decorating this room for her.  Even though it's the guest room, she's calling it "her" room and I intend to make it a light, bright and happy place.  Her escape from the gloomy winter  days...

I took these photos while I was visiting a few weeks ago.

Guest Room Before_bed

Guest Room Before_dresser wall

You see.  It looks empty, right?  And although, they're obviously not afraid of color in their home, the tones in this room are somewhat muted and make the space feel dark.

Not for long though, darlings.  Operation: Let the Sun Shine In is underway!  We are going to fill the space with a little more furniture and then layer, layer, layer.  And of course, we are going to make it lighter and brighter so that it feels airy, relaxing and cheerful all at the same time! 

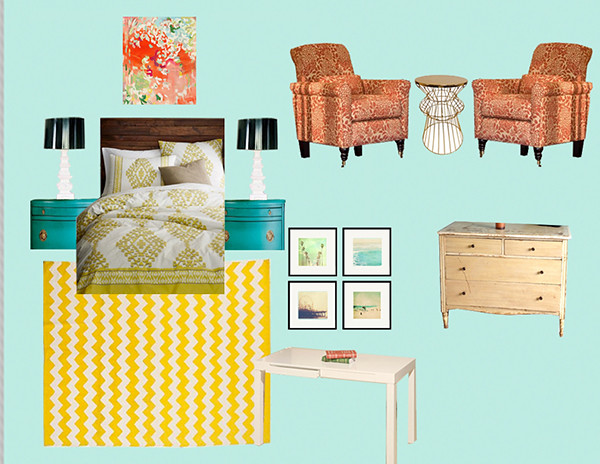
Expect it to feel a little something like this (But don't hold me to any specifics, k? This plan is evolving as we speak!)...

Guest Room Design Plan_Revised

Hello, pretty Michelle Armas print; thank you for being so colorful & fabulous and for being our jumping off point in this design plan.  Now as is true for most people decorating their homes out there, we can't just run out and buy all new furniture.  To stay on budget, we're going to use some of the existing pieces in the room and we'll be pulling furniture from other parts of the house too.

We'll keep the bed frame and use the shabby yellow chest of drawers.  Those chairs, we're bringing upstairs from the living room, and their burnt orange color is going to pop beautifully against our light and bright aqua walls.  The plan is to scour Craigslist for end tables and paint them a fantastic turquoise; we're still looking for lamps too but the black and white looks great with our design, don't you think?  The desk is quite similar to West Elm's parson series and I plan to put it on the wall where the yellow dresser is currently (see in the photo above).  It'll fill that space nicely and it'll be a great place for visitors to get some work done if necessary.

Of course we still need a desk chair, more art & accessories but I think we're off to a great start. The LA and Hermosa beach photos are a favorite of Liz and mine; I'll be sure to tell you more about the artist soon.  More photos, sources and links as this plan comes together...

I'm in shopping mode now and in the coming weeks/month I'll be heading back to Ohio for installation.  After pics coming then!

Monday, May 13

Volunteering :: It feels good.

Hello, Monday and Happy (belated) Mother's Day to all the mommas out there.  We had such a great weekend; hope you did too.

We spent this Mother's Day volunteering with Foster Care Counts.  They organized an event to honor foster mothers and their families.  It was amazing!  The event was held at this gorgeous property in Topanga Canyon; we arrived there early Sunday morning with countless other volunteers.  It was so nice to see families spending their "Mother's Day" volunteering together.  Isn't that such a great idea?

At the event, foster moms could get their hair and make-up done, get eyelash extensions and/or have mani-pedi's.  And then, once they were all dolled up, they went over to the photography tent and had family photos taken.  Too cute.  There was also a "boutique" tent filled with gently worn clothing; families could go "shopping" in there and left with bags of goodies.  Of course, there was plenty for the kids to do as well...games, rides, a huge bouncey house and a petting zoo.  The kids were so excited; it was really fun to see.  And let's not forget the grub.  Wolfgang Puck catered and did not disappoint; the food was delicious!

But let's get back to the petting zoo.  That's where Biff and I spent our time yesterday.  We helped unload the animals and set up the pen.  Then we waited.  And then...Bam!  Cotton candy covered sticky fingered kiddos everywhere!  It was fantastic.  And HOT.  And exhausting.  But so so fun!
Petting Zoo_kids

My favorite questions of the day:
Lady, what is that?  That's a piggy.  Why is it dirty?  Well, because it's a piggy.

Hey lady, can I ride it?  What? No.  Why?  Because it's not a pony, silly.  It's a goat.

Peting Zoo_goats

It was fantastic.  And aside from a couple of sour apples, the kids were all so very sweet.  It was fun to see them loving on these little animals.  Being so gentle.  Wanting to take them home with them.

They were thinking of these animals the way I was thinking about them.  I wanted to take those kids home with me that night and give them tons of snuggles too.

The more research I do, the more interested I am in foster care and adoption.  At this point Biff and I are just gathering information but I've got to tell you...  If and when it's right for your family, it seems like such a gift.  A gift you give to the child and a gift those children give you.

Sooooo if a foster mom or dad ever comes across this little blog of mine and lands on this here post, I just wanted to say...  I salute you.  Thanks for all that you do.  And to all the moms who have no legal rights and aren't always called "mom"... Happy Mother's Day.

I'm not yet sure what the future holds for us expanding our family, but if we do go down the road to foster/adoption, I plan to document it here.  We shall see.  Either way, volunteering yesterday was a great experience and we will likely be back next year.  Check out the Foster Care Counts website to find other ways that you can help.

Tomorrow, I'll be back to share a new project I'm working on and hopefully, later this week, I'll have made some  sneak-peek worthy progress on the dining room garden wall!

Friday, May 10

Current Obsession :: spindle furniture

Are you guys familiar with spindle furniture?  I'm a huge fan.  Always have been.  

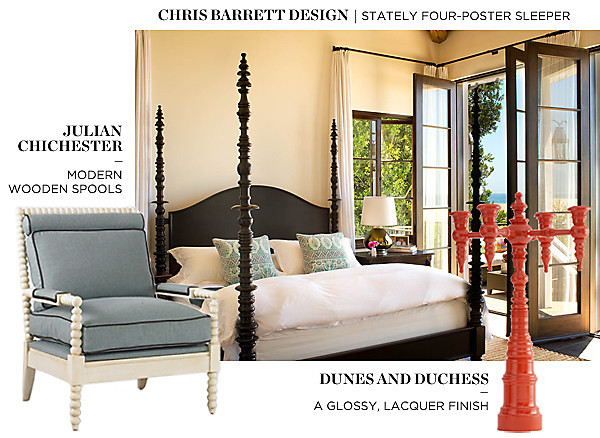
Hello, spindley chair.  You're looking mighty pretty in that traditional living room.


Spindle-chair

It's been popular since the 17th century.  Some people think the style is a little too country or antiquey.  Not me though.  I just love it.   

Spindle-Furniture

Carved spindles put a traditional twist (literally) on everything from side tables to candlesticks.  But nowadays, you can certainly find a more modern spin on this classic furniture style.

Spindle-furniture-2

You can imagine how excited I was when I came across this sweet little table at the PCC Flea Market recently.  AND I scored it for just $25!

spindle-flea market find

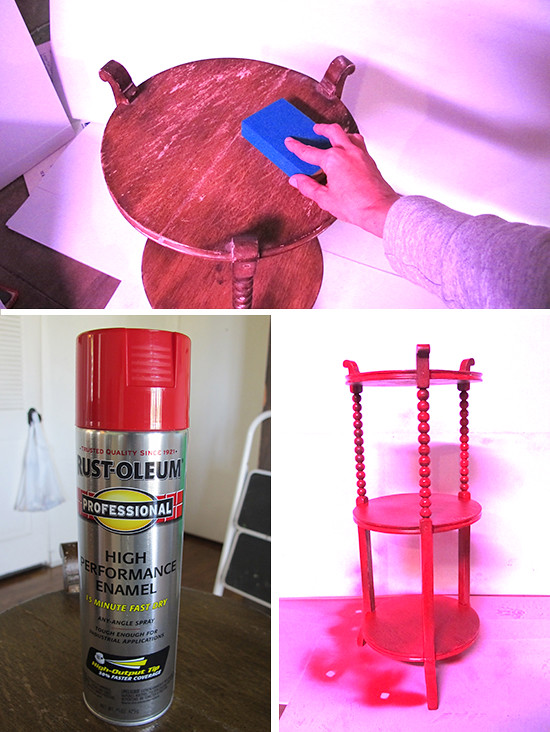
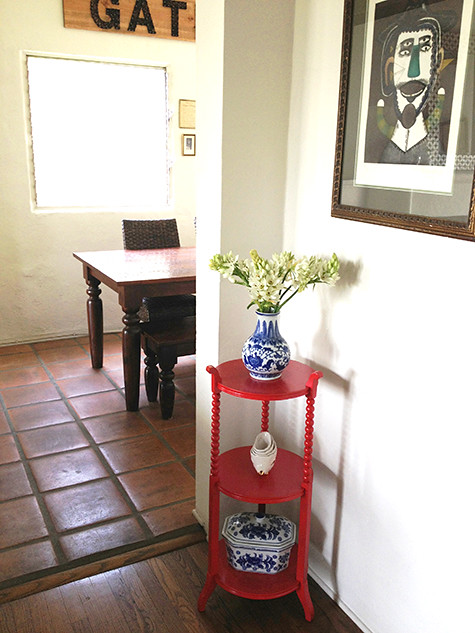
Look at those pretty spindles!  Now of course, she could've gone home with any number of suitors at the flea market that day.  But, she ended up with me, people, and as such...even though I love her au naturel look, she was destined for color!

For those who don't like painted furniture, look away, my friends; look away...  I'm seriously into shades of blue these days and my first thought was to go with a bright turquoise.  That didn't happen though.   (I know...I know...these are greaaaaat photos.  Please just stop judging.  I promise I'll get better.  Someday.)

Safety Red meet Ms. Spindle. 

spindle-fix

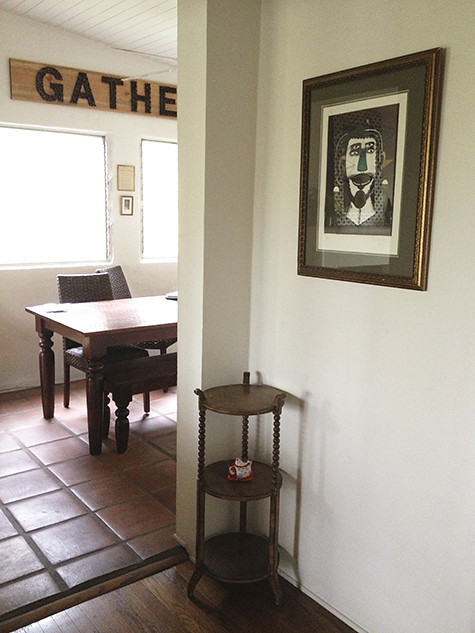
Again, here she is when we first brought her home.


spindle-before

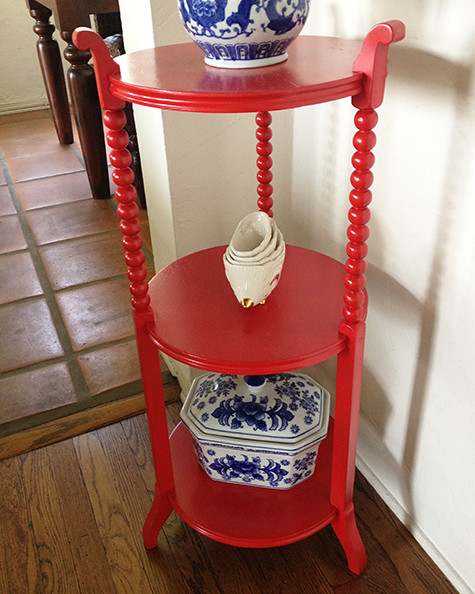
And here she is all dolled up in Safety Red. (I spy another diy project in the dining room...  Now what to do with those windows???)

spindle-after


Pretty, don't you think?  I still need to try some other styling options and that may or may not be her permanent spot in the treehouse.  I like the way she turned out though; the red is bright and cheerful and makes me happy.  And I do like the blue & white pottery with it. Take a closer look...


spindle-after-detail

Hello little hedgehog (too-cute-to-be) measuring cups from Anthropologie.  

What? Am I the only one who talks to her furniture and home decor accessories?  

So there you have it.  A quick diy project on a fab flea market find.  Many more of those to share with you soon.
Have a great weekend!

Related Posts Plugin for WordPress, Blogger...