Pages

Thursday, June 20

Black is Beautiful AND we got a new rug!

Remember this photo from the treehouse tour of the upstairs?  Well, you've already seen the before-and-afters of both the dining room and the living room, so today I thought I'd give you a quick look inside the half bath project.

The upstairs powder room is located just off the living room, near the front entrance.  You can see it in the photo below; the door is open.


Not much to see here, folks. It's a teeny tiny bathroom that has a sink, a toilet and a linen closet.  And yes; I already told you there is grey carpet on the floor in there.  And yes; I know that is disgusting. But hey...let's just focus on the positive, k?


Talk about a taping nightmare.  What you're looking at here, people, is the ceiling.


As the paint went up I was terrified.  It was a total splotchy mess but it was too late to turn back so forward I marched.  No worries though.  4 coats of black paint later, we were all smiles around here.


Found this vintage painting for $15 and knew it was going to be a hit against those black walls and the celadon zig zag rug from West Elm.


Black and beautiful!  Here she is, friends, and she looks great!


The gold mirrored tray and cute little pill box are vintage and the Sydney Hale Co. candle is a little slice of Heaven that I was gifted from Twig & Willow. I highly recommend the cedarwood + vanilla scent; it is absolutely divine.  Still working on the accessories for this space.

I do love the way the West Elm zig zag rug color ties into the vintage floral artwork.  AND it hides a lot of that horrible grey carpet.  Win! Win!


Here's the view from the bathroom looking out into the living room.  Now of course, it's totally blown out due to all that sunlight bursting through the windows...amateur mistake...but you get the point.


And I know we're talking about the half bath today but how about a little love for our new living room rug too!  I recently ordered this Beaumont Adileh Natural Rug from Rugs USA.  It is so SO lovely.  Even prettier in person.
 I love that it looks like a vintage Persian without the $3500+++ price tag.  We went with the 'natural' color but we were super close to going with the 'spruce blue' which looks really pretty too. Because our entire upstairs area is so neutral and white, the living room really could handle a vibrant rug.  Instead though, we opted to stay with something neutral because, remember, at some point I plan on replacing these sofas and I didn't want to limit myself due to a crazy vibrant rug color.  In this rug, you can see some black & shades of grey, as well as some really faint apricot tones.  So far I am loving it but let me live with her for awhile; I'll do a full review in a few months and let you know how this bargain beauty is holding up. 

In other news, this is happening.  


New and improved garden wall pics coming soon!


Wednesday, June 19

I Spy :: furniture with feet

I love me some furniture with animal feet.  Seriously.  I can't really explain it but it makes me smile.  Maybe it's just that it's so totally unexpected.

Take for instance the bar stools in the kitchen below; if you were visiting with the chef in this {gorgeous} kitchen, it might take you a bit for you even noticed those fab hooves.


And this chair is just too much.  Doesn't it look like it wants to walk around the house with you sitting in it?  It makes me laugh.  Maybe that's it.  If you have furniture with animal feet in your home it probably means you have a good sense of humor; I love a bit of comedy in decor, don't you?


When you put your feet up after a long day, you surely won't miss these golden tootsies:


And how about this bench?  It's from a few years ago, designed by Oly Studio.  It's less funny and maybe even kind of scary.  But not in a bad way.  More like Harry Potter scary.  Okay, so that means it's not scary at all; maybe it's just a wee bit creepy is all.


So if you were paying attention during yesterday's living room progress report here at the treehouse, you may've noticed that we too like a bit of whimsy when it comes to decor.  We've actually got some hooves of very our own.


How great is our coffee table?  All those hooves!!!  I'm a little bit in love with it even though that glass top is crazy-making.  I'm convinced that there is some sort of dust conspiracy happening in this house.  It's like all the little pieces of dust communicate with each other and say, let's pile up again and see if we can make Bridgette insane today.  Seriously.  I am completely obsessed with dusting.  Can not help myself.  It's all over everything ALL the time.

But, oooooh, when she's clean, she really is so very pretty.


I have Mr. Cham+Thom to thank for this little piece of lovely.  We were living in Seattle and our vintage chrome and glass oversized coffee table just didn't fit in our tight living room area.  That and I was finally embracing my love for all things brass.  Sooooo the search began for a new table.  I mentioned it to Biff and at first, he was a little turned off by the whole brass thing. It didn't take long for him to hop on board though and once he came around HE started looking at Craigslist everyday, searching for our new table.  It happened pretty quickly too.  We scored this vintage beauty for just $35!  It was definitely a long haul to go pick it up but look at it; it was totally worth the drive.

So my friends, whether you've got big bucks to spend or are doing the thrifty thing like we are, there are fun footed furniture options out there.  One of my clients liked our coffee table so much, that she started scouring Craigslist everyday and found a table for her place that is nearly identical to the one we have!  We're still working on a few more projects at her place but I hope to have pics of that fantastic girlie glam pad for you soon.

In the meantime, whether it's animal feet on your furniture or your very own miniature gnome collection, drop the stuffy attitude and have a sense of humor when it comes to decorating your space.  A sliver of comedy is a great conversation starter among guests and in general, adds a welcome bit of happy to your home.

And who doesn't want a happy home?

images via Oly Studio & here

Tuesday, June 18

The Treehouse :: A living room progress report

Happy Tuesday, everyone.  The time has come for a Camp Cham+Thom living room progress report.  I've hesitated to post pictures because I love things to look "just so" but that's not real life, now is it?  Our home is a work in progress and will probably continue to be so for quite some time.  I'm changing my mind so much these days.  It's probably best that I document my thoughts here, if for no other reason, than to have something to refer back to!

Okay, so as a reminder this is how the living room looked when we rented the space.


We're so grateful for the gorgeous wood floors, all that natural light and the fantastic wood beamed ceiling.  AND we're up in the hills and have an incredible view of the Silverlake Reservoir.


This picture doesn't do it justice one bit and yet it STILL looks gorgeous.

That reservoir is actually calling my name this very second.  It does that sometimes.  Bridgette, get off your bum.  Come down here and exercise...  Yeah Yeah...I'll see you soon, lil' reservoir; very soon.

As I mentioned in an earlier post, before we moved in we removed the funky window mouldings, threw a fresh coat of white paint on everything and took down that eyesore of a television that was  protruding from the wall.


This is a photo I took after we moved in our first few boxes.

I really love our home. You walk through the front door and there's no mistaking it; there's a very Zen feel in here.  The location and the view can't be beat either and I've also really loved having a fireplace again.  There's just something about sitting by a fire that I adore.  It's true. The first day there's even the slightest chill in the air, I want to throw on a log.  I'm a gal who loves to be comfy cozy and warm; so for me, having a fireplace is nearly a necessity.  From the get go, I knew I wanted stacked wood inside the house and was dreaming about it even when we were back in Seattle.  But where oh where to put all that firewood?

Once we got settled, it seemed to me that the empty space to the right of the fireplace was begging to be utilized.  Sadly, we  I do watch a lot of tv and that seemed like the only spot for it.  Now you might be saying, but you just removed a perfectly good tv from that very spot.  Well yes, that's somewhat true BUT... We definitely didn't want a super high mounted television (like the one the previous tenant had) nor for it to be attached to a big silver hinge.  No one needs to watch tv while sitting at the dining room table, people.  Paleeze.

Instead, I thought it would look better if we created a platform for our television to be at eye-level; and for me, it was important aesthetically, for the tv not to be higher than the fireplace mantel.  If it were to go higher, it seemed like it would throw that corner off balance.  Also part of the plan? The tv platform would double as a structure that would hold our firewood and keep things tidy.

Sooooo, this is what we came up with and truly it could not be a more perfect design solution AND it was easy to install.


The plan was to assemble the structure first and then put it in place and secure it to the wall.  BUT... once it was put together we realized that it was a super tight, near impossible, fit.  Turns out our beautiful (old) treehouse has walls that are a bit uneven so we just ended up pushing and wedging the platform until it fit.  It's so snug that we didn't even need to secure it to the wall.  Easiest DIY project ever!  Of course, I would always recommend securing anything top heavy like this to a wall if possible, especially if you live in earthquake country like us.


I must say, it's super functional and actually looks like a built-in.  I'm super happy with it.

Here are some other shots of the progress we've made in the living room.  And I'm still working on my photography skills, folks, so bear with me.

Hello, light, bright & gorgeous lil' treehouse.


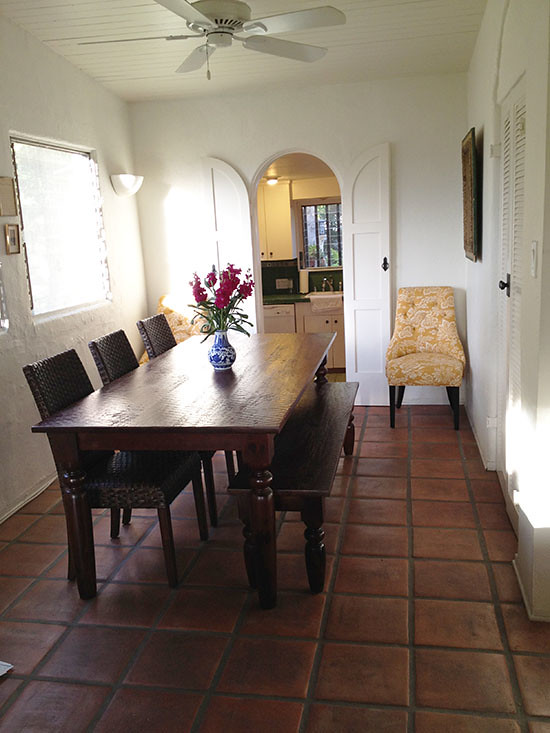
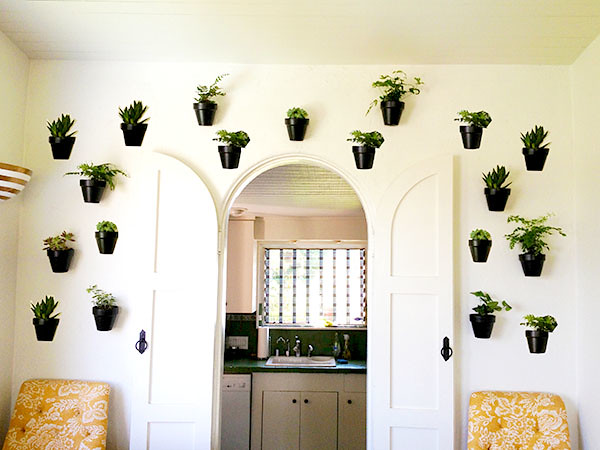
Nice to see you, pretty plants in the dining room.  Sometimes more IS more, so we've purchased more greenery and some smaller pots and are going to be adding to our garden wall soon!


The wall opposite the fireplace is a little challenged.  It's just SO huge.  Need to add more art.  More art everywhere.  I know...I know...  But in the meantime, let's all smile at the colorful musings of the lovely Louis Cannizzaro.  Check him out at www.powderfrench.com.  He's a sweetheart and if you don't own his artwork, you should.  You can thank me later.


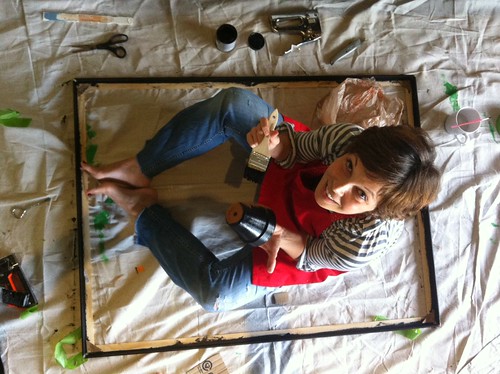
Woah...  Wait a second.  I forgot to mention that we had a supermodel on set today.  Miss Gracie Jane Pickle...who in this photo is unsure that she wants anything to do with this here photo shoot.  Little one, why must you glare at me so?


I wish I could take the credit for this gorgeous fireplace screen.  Carol (our landlord) picked it up at the Rosebowl.  Look closely and you can almost see an Otomi pattern.  I LOVE it so much.


Like I said before, this side of the room is a wee bit "challenged." Although I've loved my Vanessa de Vargas inspired green campaign dresser (LGN wrote about it here), it may be time to bid it adieu.  OR maybe we can move her downstairs or give her a fresh coat of paint or something.  I dunno.  For a second we toyed with the idea of putting a bar in that little nook but now we've got small kiddos on the brain so that is looking less and less likely.  We're still a little undecided, but we've also talked about getting some type of vintage shelving for over there.  A nice vertical piece with some height to it maybe.  Not sure though.  AND yes...yes...  I know we need more art.  

Oy.  And much better dresser styling.  Keeping it real, people; just keeping it real...


So there you have it, my dears.  The longest picture-packed-post ever.  Our upstairs living space is almost done.  Well, as done as it's going to get for a bit.  

Here's why we're just at "almost":

1. We'd love to replace our sofas as they are actually super uncomfortable.  Biff and I have discussed it and we are quite certain that we've been cursed with bad sofa karma...although we're not sure why.  Also, sadly, Gracie Jane Pickle thinks they are her extra large scratching posts... and as much as I've thought about breaking her legs and tearing out her nails (I know.  I'm a horrible person.) when I wake up to the noise of her scratching in the middle of the night, I just love her too damn much to do so.  Soooo we've resigned to ugly cat scratched corners on these uncomfortable sofas.  I think because of the light color of the sofas though, it's not that super noticeable.  Or maybe I'm just dreaming.  Who knows.  

2. Like I mentioned earlier, we want to change out the green campaign dresser.  We'll see when or if that ever happens. 

3. I am in the process of buying and creating more art for the entire house.  More on that soon.

4. And undoubtedly, a few more pillows, a throw or two and something with a little more height to go on the mantel wouldn't hurt either.  

So you see, we are allllllmost there.  One of these days I'm going to have this place properly photographed by someone who knows what they're doing.  I bet it will make a world of difference. Can't wait!  Must.  Finish.  Projects!!

First though, I better get down to that reservoir and burn some calories.

Have a great night, lovelies.


Thursday, June 13

DIY:: A birdcage planter

Hello, World.  Happy Thursday.

Boy oh boy.  Life has surely been turned upside down lately.  I'm finding my way through it all but wow, has it been challenging.

Thankfully, house projects can be a wonderful distraction and I've been working on quite a few of them.

So, who here likes the use of birdcages in decor?  I've got to be honest.  I'm not a big fan.  Or shall I say, I wasn't a big fan.  Until, that is, I saw this:


Hello, Bri Emery's gorgeous dining room designed by the ever-so-talented Emily Henderson.  And hey hey hey, you sweet little bird cage/planter thingy.

Okay, so let's just forget about the adorable birdcage for a second.  Regarding Bri's dining room, I think we can all safely agree on the following: a.) That lighting fixture is ah-mazing, b.) I need that over-sized photo by Max Wanger right NOW, and c.) Her table and chairs are perfection.

All in agreement, say "Aye".

Alright, now back to business.  So for me, almost always I'm going to say no to a birdcage in the house.  A gold birdcage doubling as a planter though?  Well now you have my attention.  Emily used this lil' lovely from A+R.

It's great, right?  But kind of spendy at $150+.  Now, of course, you get what you pay for and the one from A+R is super fancy and beautiful, with a porcelain base to boot.  And the description on their website?  "A twee incarnation of a bell jar."  It's like they know me & are marketing straight to my heart!

Sadly, no matter how lovely it is, I just cannot swing $160 for a decorative gold birdcage at this juncture.  What I can do though, is make one!

Spotted: Birdcages at Michael's on sale for 50% off!


For this project, I decided to get as close as possible to the A+R birdcage, so I opted for the most plain of the bunch.  I left with this birdcage & wooden base, both pieces for less than $22.

I had this can of spray paint in the garage, left over from a different DIY project and I really like this shade of metallic gold.  You should try it.


The actual spraying took about three minutes.  Seriously.


And after a few brush strokes of on-hand glossy white paint for the base, I found myself here:


I like the design/texture of the bottom of the cage, don't you?  And although it was looking super cute at that point, I totally forgot about the screw pointing out from the very top.  I needed a finial, but again, keeping the A+R design in mind, I wanted to keep things simple.  So back to Michael's I went...  And that's where I found the perfect solution for less than $5.


Finial dowel caps.  Who woulda thunk it?  I simply spray painted one of these lil guys (which took all of 2 seconds) and popped it on top.  And then, voila!


Pretty, right?!   Now, keeping it real, I should let you know that I haven't actually glued the whole thing together yet.  Soooo, if I open the top, the dowel cap falls off and when I move it, I have to be really careful because the base isn't attached either.  I know...I know... Gluing or even using teensy nails to secure the base would take all of 5 seconds to do.  It's on my list, people.

In the mean time, she's the perfect home for one of my little green friends.  And I think she's super pretty whether she's officially "finished" or not.


This lil' gilded cage and company has moved around the house quite a bit but most often she's on the coffee table in the living room or perched on the table in the newly greened up dining room.  A gold birdcage/planter is a fun pick-me-up for any room and can be yours for less than $30.  Do it!

Thursday, June 6

Affordable Art

Are you an art lover like me? 


Let me clarify.  It's not that I really "know" anything about art. I can't tell you who painted most masterpieces or necessarily go in to detail regarding the medium they used or their process.  Thankfully I don't have to be "educated" about art to love it though.  I just know what I like when I see it and I totally enjoy scouring the web, flea markets and local stores for affordable pieces.

These days if you love art but have a limited budget, you still have some great options available to you. Lest we forget how many creative geniuses can be found on Etsy?  You'll have to do some sorting, yes; but keep digging and you'll find them there. And lucky for us, there are some amazing bloggers out there who've already done a lot of the dirty work for us.  I'm sure you've all heard of The Jealous Curator ; love her.  And if you haven't read her blog before, I suggest blocking off several hours over several days to search through her archives.  The goodness is just too much to handle in one sitting!!!  And let's not forget sites like www.art.com and www.20x200.com; they both have great selections too.

Of course, I personally love the hunt for just the right piece.  And even if my client (or myself for that matter) can't afford a $10,000 original oil painting at this point, there is still great art out there that won't break the bank.


Case in point: Remember when I mentioned that I was decorating a guest room for my friend Liz in Ohio? Well, the project is in full swing and I am headed back there in early July to do the installation. Can't wait!  Oh, and you know that initial design plan I shared with you awhile back?  Just forget it because, as to be expected, everything has changed at least 20 times since then.  I guess that's why they call it a "process", right?

This last week I took care of several big purchases and finally got around to selecting the art too.   Isn't it true that the art and accessories in a space are really what bring it all together?  Well, this space is no different.  Our revised color palette is mostly aqua, navy and orange, with pops of bright white and hints of yellow.

If you'll recall, I told you that my friend Liz used to live in Los Angeles and is always jonesing for the beach.  I couldn't go too far towards a cheesy traditional "beach house" feel though, because it would be SO opposite the rest of their home. So I guess we're going for our own unique "version" of beachy; she specifically wanted the space to feel "happy".

As the pieces I've selected start rolling in, I'm getting more and more excited and a teensy bit jealous.  Myan Soffia photographs, Michelle Armas AND Samantha French artwork ALL in the same room? I die.

Just the other day, I received the Michelle Armas print titled, "Laura".  Wow. The colors are spot on perfection and oh so pretty; it's going to look super gorgeous against Benjamin Moore's "Oceanspray", which is the light aqua color that will be on the walls.  This print was our initial jumping off point for the entire room; I knew I wanted it for the space before I even knew what we were doing in there.  Seriously.


And then there's the beautiful moody photography of the super sweet Myan Soffia.  Liz flipped for these photos so we are going to have this grouping of four (in 20"x20" frames) above the desk area. I really think seeing them on a regular basis is going to make her super happy.


And my oh my.  I cannot fully express the love I have for this Samantha French print.  I can't wait for it to arrive! I want. I want. I want.   At $195 for the 16x20 print, this baby isn't cheap but it also doesn't quite break the bank and you know it's going to totally be worth it.  So come on.  Now if someone would just spot me $7,000 that'd be swell.  Because I so NEED this original Samantha French oil, titled "Breakthrough", above my fireplace.  Yesssssss!


So there you have it, folks.  Affordable art for the Ohio Project.  I'm green with envy but totally happy with the selections.   These, along with smaller, more personal, framed photos and decorative objects we've collected, are going to completely bring that room to life.

Oh how I love an art project.  String art, painting on canvas, taking photos, working with vintage arrows...it's all art to me and I have lots more to share on the subject.  Stay tuned...

And in the mean time, who are some of your favorite artists?


Wednesday, June 5

Our Interior Garden Wall!

I guess I sort of dropped off the planet last week.  Sorry.  I've been dealing with some personal issues that have taken a lot out of me.  I'm like a little bear; sometimes I just feel the need to scurry into my humble, but well-decorated-of-course, cave and hibernate.

Honestly, I'm still not feeling that great and today has been especially challenging but I am determined to snap out of it!  So here I am.  Hello, strangers.

Let's talk about that gash durn GARDEN WALL!!!  Finally.  Well, maybe I shouldn't say "finally" as in finito, put a fork in 'er, she's done.  Because...  Well, she's not.  She's not done, that is.  Or is she?  Help me decide.

As you know from reading this post, my garden wall obsession started with our honeymoon trip to Spain last year.  Maybe someday I'll document that vacation here but for now, what I can tell you, is that Spain is AMAZING!!  I fell in love with so many different aspects of that country, but it was the city of Cordoba that served as inspiration for this latest DIY project.

The older part of Cordoba is filled with narrow, winding streets and most of the homes have lovely courtyards filled with vertical gardens showcasing impressive collections of potted plants and pretty flowers.  I tell you, I haven't been able to get those beautiful gardens off my mind for months now, so when it came time to spice things up in the dining room...I knew just what I wanted to do!

First though, I mapped out my "idea" and sat with it for a good week.  Yes.  Little pieces of green tape spotted the dining room wall for at least a week.  Maybe even two.  I change my mind so frequently with decor (I call it Design ADD) that I've found this works for me.  I just sit with my ideas for a second.

Mapping


Which is what I did here and after an acceptable period of waiting...determined only by God knows what...I decided to go for it!  Well, I should say "we" actually, because Biff was a huge help with this one.  Gotta give credit where credit is due.

Okay, so after the mapping, came the shopping, painting, drilling and planting.


We decided to go with 4" pots and I painted them black.  I used Rustoleum Ultra Cover Premium Latex Paint in Flat Black.  And honestly, I just kind of slapped it on there haphazardly. As you can see from this bottom left photo, I cheated a little and didn't even go all the way to the bottom in the inside of the pots.  Yes. I'm a slacker like that. 

Painting

Once the paint was dry, Biff drilled a small hole into each of the pots.  Easy peasy. Done in 5 minutes.

Next up, came the planting.  Now, here at Camp Cham+Thom we've been known to kill a plant or two, or ten (truthfully).  Sooo, we're really just winging it here.  I'm going to try my best not to over-water or under-water and just pray these suckers live.  And well, if they don't, it's about $4 per plant to replace them.  Not that I want to do that or anything, but I'm not going to lose sleep over it.

So we bought lava rocks to help with drainage (btw this huge bag was a WAY better deal than some of the smaller bags).  Don't go for the teensy weensy pretty rocks that cost a ridiculous amount of money; no one is going to see them.

After a small scoop of the rocks, we loosened up each plant's roots and replanted them, adding the proper soil (depending on whether it was a fern variety or succulent).   That's another thing.  How did we choose the plants for the wall?  Again, we're just kind of winging it.  The dining room does get bright sun but not for very long each day; mostly the light is filtered.  Fingers and toes are crossed that our green babies survive!

Once all the plants were potted it was time to start hanging them.

plants_2

Can we just talk for a second about these "Quick Hangers" we picked up from Orchard Supply Hardware?  We had no idea if they'd work; the angle was perfect but we were afraid the "stem" wouldn't be long enough.  But Bam!  They work perfectly!  Well, so far.

I do have to take them down to water them but that isn't too much of a hassle.  They go on and off their little "perch" quite easily.  I water them in the kitchen, give them some time to drain and then just put them right back up.

Hello, pretty gold and white striped sconce with your new gorgeous green friends!


Just a reminder.  This is how the dining room looked before.

treehouse dining room_table

And here she is now.


Pretty, right???  We think so.  Our dining room is totally open onto our main living area and I love glancing over and seeing the greenery on the wall.  The only issues are... a.) I'm not loving the "heart" shape that's happening.  And b.) Now, I WANT MORE PLANTS!!  And with a little help from Photoshop, I'm exploring my options...mapping it out, if you will.

extra plants
Wait.  Is that too many?  Now that looks a bit cluttered, right?  Or does it?  See.  Design ADD.  It's a killer.

<le sigh>

Alas, perhaps I just need to sit on it for a few days.  Because that's what I do.

Well, that's it for me today, party people. Maybe you'll be inspired to get off your bum and make your own garden wall.  If you do, I'd love to see!


Related Posts Plugin for WordPress, Blogger...