
I'm still not entirely sure but, at the moment, I'm feeling inspired. I was looking through tons of pictures last night and reminiscing about some of our old home projects. Such good memories... We were covered in dust and dirt for months. We had sore muscles and were operating on no sleep but we were happy as clams. I really just don't want to forget any of it. So bear with me as I finish documenting some of the past so I can get to the present.
I've told you a little about the San Gabriel house already. If you're here for the first time, you can read about our den and the kitchen remodel here and here. We didn't stop there though. Take a look at what we did in the main bathroom.
Now I wish I had been better at documenting things back then (and now). If only I had thought to get better "before" photos.
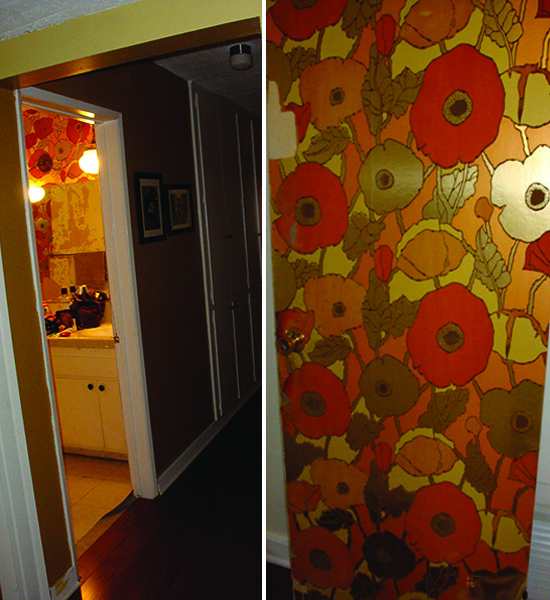
I really DO love wallpaper. Even crazy funky fabulous orange flower wallpaper. But this wallpaper was peeling all over the place and had a flocked/velvety texture. Can you imagine all the germ-y grossness that was stuck in there??? I die at the thought of it.
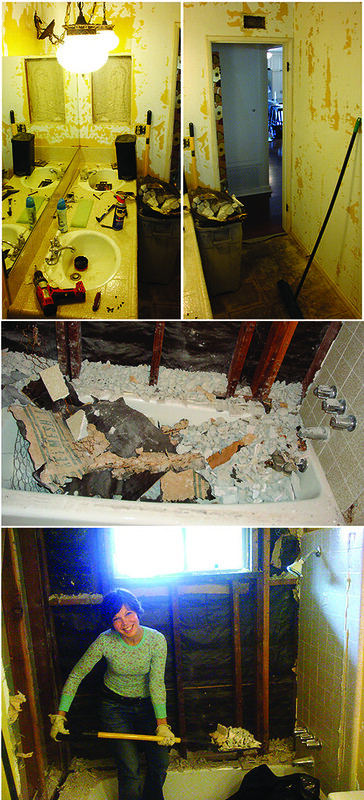
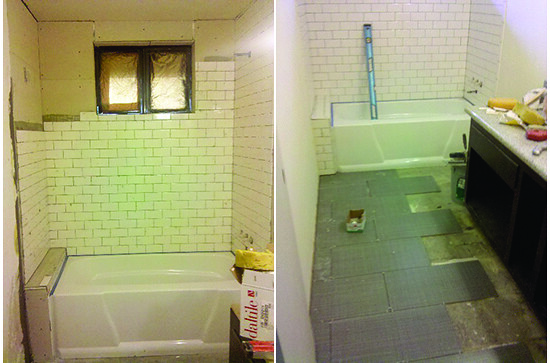
So one day, this happened...
Good times... As usual, we were on a super tight budget for this project. We had plans to tweak and re-use the vanity but I sourced new lighting, tiles, the tub & toilet, sinks and faucets; I found almost everything on Amazon and Overstock.com. The mirrors we ended up going with are ones I found at Home Depot for about $59 a pop. The shower curtain is actually made of curtain panels I purchased from Cost Plus. Truly, we got amazing deals on everything. We did spend a fair amount of money on the floor tile but it was such a small space that it didn't break the bank.
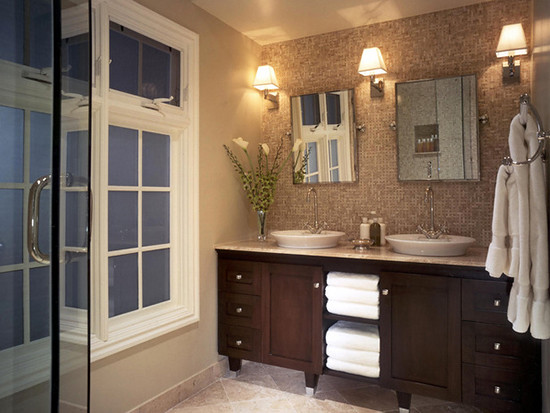
Here is my original inspiration image for the bathroom vanity.
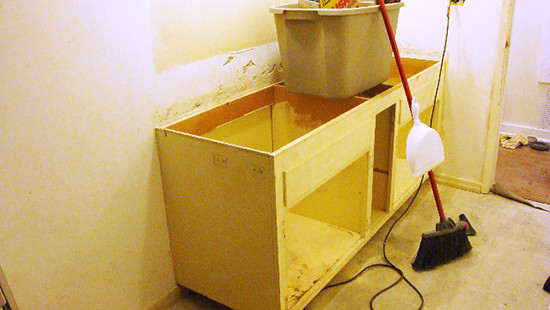
And here is what I had to work with. Actually this is a "mid" reno photo. At this point we'd taken all the doors off and (believe it or not) cleaned it up a bit. Eventually, we built a towel shelf in that middle section, applied primer, a ton of glossy black paint and new knobs. Oh, and we purchased a piece of granite for the top; I don't think it was more than $200 though and that's on the high end.
Once the vanity was handled, things really started happening...
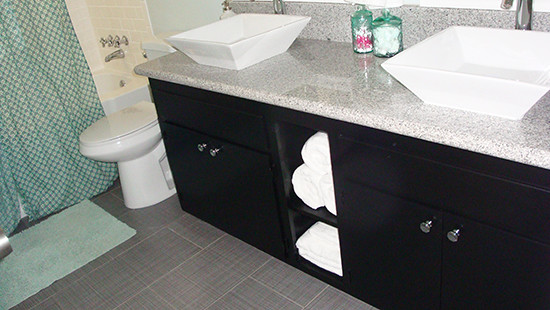
And when it was all said and done, we ended up with this pretty lil' number! So bright. So relaxing. For under $2000 we had ourselves an almost completely brand new bathroom.
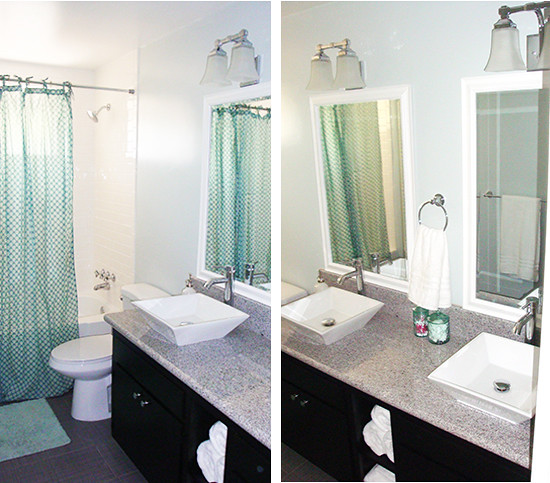
Sorry about my photo skills... The wall color and granite were closer to what you see on the left there. And here's a closer look at the vanity. It really did turn out great.
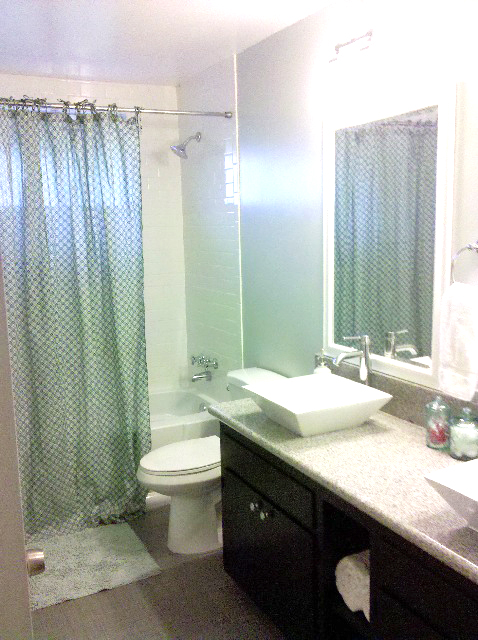
And there you have it, folks. B + B's new & improved old bathroom. There was a lot of blood, sweat and tears in the process but in the end we could take a nice warm bath and it was all worth it. :)
No comments:
Post a Comment